Support for Net gear Routers & Extenders
Call Toll-Free : +1 (866) 355-3681
Get Assistance from MYWIFIEXT.NET Experts
Configure or fix your WiFi Range Extender hassle-free via NEW EXTENDER SETUP—click the links below for a quick fix.
How do i setup wifi range extender?
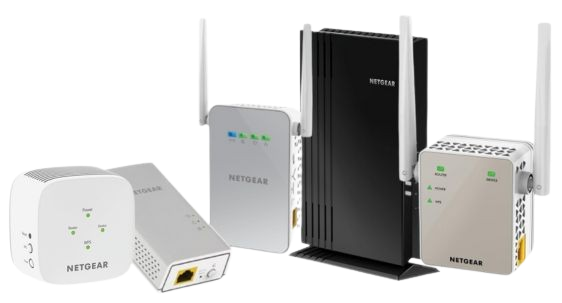
A simple and powerful instrument for improving internet connectivity in places with spotty signals is a Wi-Fi range extender. It receives your current Wi-Fi signal, boosts it, and then sends the stronger signal to areas of your house or place of business that are difficult to reach. This removes annoying dead zones and makes it simpler to enjoy online gaming, video streaming, and browsing without interruption. Wi-Fi extenders are a cost-effective way to increase coverage because they are simple to install and work with the majority of routers. A Wi-Fi extender guarantees stronger, quicker, and more dependable connections whether you live in a large home or work in a large business.
How to Troubleshoot a WiFi Range Extender?
- Check the power supply– by making sure the extension is plugged in correctly and that the power light is on.
- Check Your Position: For optimal coverage, position the extender midway between your router and the weak signal region.
- Check LED Indicators: To understand connection lights and signal strength, consult the extender’s handbook.
- Reconnect to Router: If the connection is lost, try pairing the extender with your WiFi router again.
- Update Firmware: To improve performance and address bugs, install the most recent firmware updates.
- Reset the Extender: If problems continue, use the reset button to return to the original setup.
- Verify Interference: Avoid placing the extender near thick walls, cordless phones, or microwaves.
- Reconnect Devices: Reconnect your devices to the extender’s network and forget about the previous one.
Note: If you need any assistance regarding your wifi range extender, get in touch with us via the chat button you see on the bottom right corner of this page
- Make sure your main WIFI router is working and has an active internet connection.
- Type mywifiext.net carefully into the address bar, not the search box.
- Ensure your device is connected to the extender’s default WIFI before setup.
- If mywifiext.net doesn’t load, use 192.168.1.250 in the browser.
- Remove cookies or try a different browser like Chrome, Edge, or Firefox.
- Security software or VPNs may block access; turn them off temporarily.
- Restart your router, extender, and computer/mobile before trying again.
- If nothing works, press the reset button on the extender and try the setup again.
How do i login mywifiext local?
Ap Extender Setup
- Plug in your WIFI extender or router and ensure it’s receiving stable power.
- Use an Ethernet cable to connect the extender/router to your main modem or router.
- Open a browser and enter the default IP address (e.g., 192.168.1.1 or 192.168.0.1) or mywifiext.local if supported.
- Enter the default username and password (found in the manual or on the device label).
- Choose Access Point Mode in the setup wizard and configure WiFi name (SSID) and password. Save settings, reboot the device, and reconnect your smartphones, laptops, or smart TVs to the new AP WIFI network.a
- Plug your WiFi extender into a power outlet and wait for the LED lights to stabilize.
- On your laptop, PC, or mobile, connect to the extender’s default WiFi name (SSID).
- Launch Chrome, Edge, Safari, or Firefox on your connected device.
- In the browser’s address bar, type mywifiext.local and press Enter.
- The Netgear extender login page will appear on your screen.
- Type your username and password. If new, use the default details mentioned in your extender’s manual.
- Follow the on-screen instructions to configure your extender or manage existing settings.
- After login, save settings and reconnect your devices to the extended WiFi network.
How do I place the extender for best coverage?
- Put it roughly halfway between your router and the dead zone, within good signal range of the router (not in the dead zone).
- Avoid thick walls, metal objects, microwaves, cordless phones and reflective surfaces.
- Elevate the extender (on a shelf) rather than on the floor and test a few spots — most models have a signal/LED indicator to help find the sweet spot.
How do I connect the extender to my existing Wi‑Fi?
- Two common ways: WPS (if both devices support it) or the web/mobile setup wizard.
- WPS: press the router’s WPS button, then press the extender’s WPS button within ~2 minutes. Wait for the extender to show a successful connection.
- Manual: plug in the extender, connect a phone/PC to its temporary network, open the setup URL or app, follow prompts to select your router SSID and enter the Wi‑Fi password.
Should the extender use the same SSID as my router or a different one?
- Same SSID: devices can roam more seamlessly between router and extender, but some devices may stick to the weaker signal.
- Different SSID: makes it clear which AP you’re connected to and can help troubleshoot.
- Either works—choose same SSID for simplicity or different SSIDs if you need control over which AP each device uses.
I’m connected to the extender but there’s no internet — what should I check?
- Ensure the extender is actually connected to the router (check the extender’s uplink/Wi‑Fi LED or status page).
- Reboot modem, router, and extender.
- Check extender firmware and update if available.
- Make sure the extender is in range of the router (move it closer temporarily to test).
- If the extender gets an IP address from the router, but still no internet, check router/modem upstream connection with a device directly on the router.
How do I reset the extender to factory settings?
- Locate the reset button (small pinhole on many models). With the extender powered on, press and hold the reset button for about 8–15 seconds (use a paperclip).
- Wait for LEDs to blink/return to default pattern, then redo the setup process.
- Note: reset erases all saved settings (SSIDs, passwords, admin password).